Managing visual entries and exits
In the Visual entries/exits (Visueller Ein-/Ausstieg) area, you can manage visual entry and exit points. You can use these to create rules to check transitions between stories for compatibility.
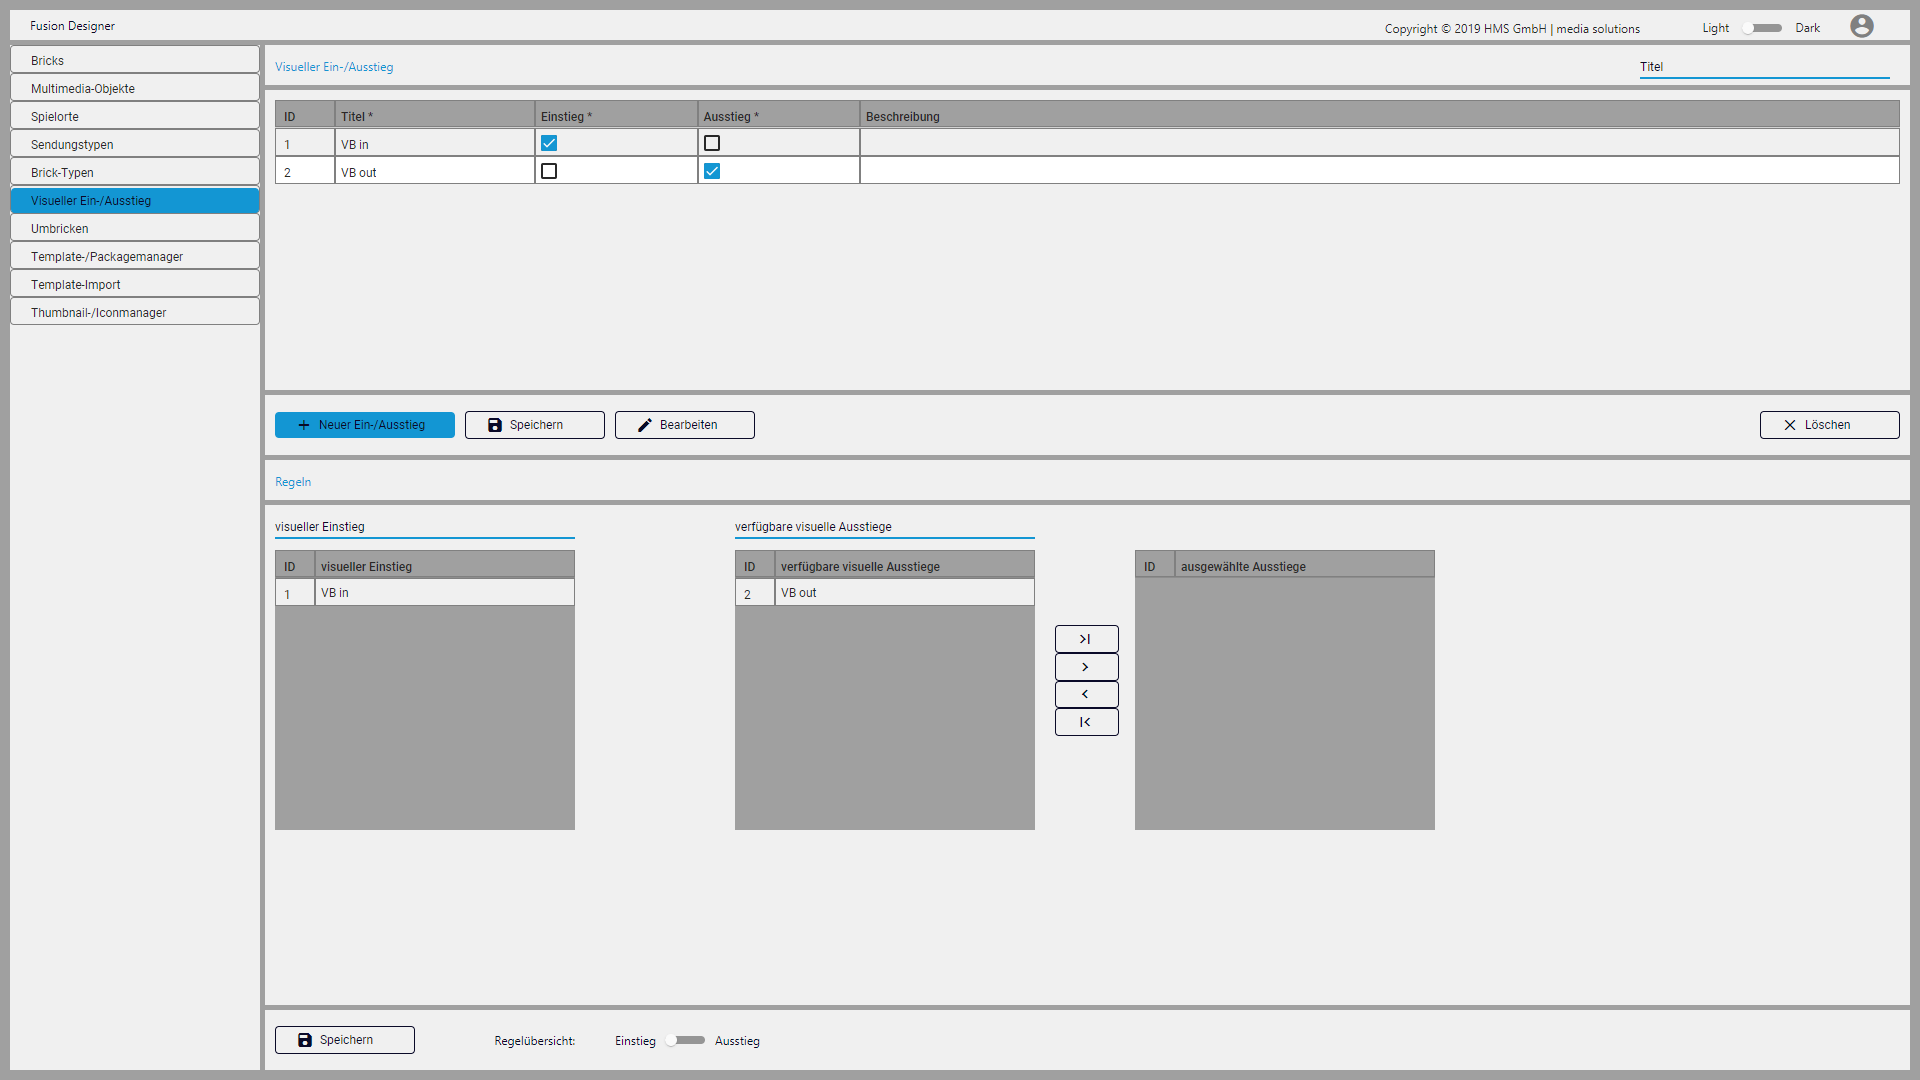 Figure: Visual entry/exit
Creating a new visual entry/exit
To create a new visual entry/exit, proceed as follows:
- Click New entry/exit (Neuer Ein-/Ausstieg).
- Enter a title, select whether it is an entry and/or exit, and optionally enter a description.
- Click Save (Speichern).
Editing a visual entry/exit
To edit a visual entry/exit, proceed as follows:
- Click the entry/exit to be edited.
- Click Edit (Bearbeiten).
- Change the properties of the entry/exit.
- Click Save (Speichern).
Deleting a visual entry/exit
To delete a visual entry/exit, proceed as follows.
- Click on the entry/exit to be deleted.
- Click Delete (Löschen).
- Confirm the subsequent dialog with Yes (Ja).
Editing an entry rule
To edit an entry rule, proceed as follows:
- In the lower Rule overview (Regelübersicht) area, set the switch to Entry (Einstieg).
- In the Visual entry (visueller Einstieg) list, select the rule to be edited. Above the list is a search field that you can use to search for specific rules.
- In the Available visual exits (verfügbare visuelle Ausstiege) list, select the exit to be assigned.
- To add the exit to the Selected exits (ausgewählte Ausstiege) list, either double-click the exit or click the
 icon.
icon. - To alternatively add all available exits, click the
 icon.
icon. - To remove one or more exits from the Selected exits (ausgewählte Ausstiege) list, select the exit to be removed and use the other two arrow icons.
- Click Save (Speichern) below the rules.
Editing an exit rule
To edit an exit rule, proceed as follows:
- In the Rule overview (Regelübersicht) section below, set the switch to Exit (Ausstieg).
- In the Visual exit (visueller Ausstieg) list, select the rule to be edited. Above the list, there is a search field that you can use to search for specific rules.
- In the Available visual entries (verfügbare visuelle Einstiege) list, select the entry to be assigned.
- To add the entry to the Selected entries (ausgewählte Einstiege) list, either double-click on the entry or click the icon.
- To alternatively add all available entries, click the icon.
- To remove one or more entries from the Selected exits (ausgewählte Ausstiege) list, select the entry in question and use the other two arrow icons.
- Click Save (Speichern) below the rules.